Realistic Mercury Text Effect Photoshop Tutorial
This tutorial will show you how to create a realistic mercury effect which you can use on shapes or texts.
01. Start by opening a new document. Fill in the background layer with any color though black/dark gray is the best since then the effect really pops out. Now select the Type tool and choose your font. Its best to use liquid round fonts for not only the texture to look realistic, but also the shape. Type in your word.

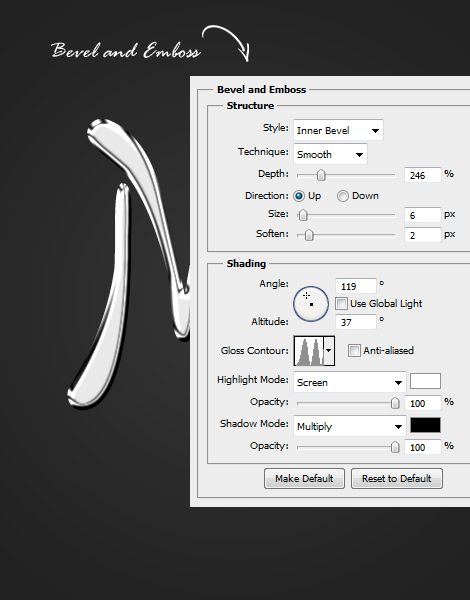
02. Lets start adding the style. For that move to Layer > Layer Style > Bevel and Emboss. A new window will pop where we will be adding effects throughout the tutorial. Bevel and Emboss is the fist and the most important step since it adds to the text the most. So add the values carefully. Remember if you are using much bigger font, you may need to add more to the values, if much smaller, scale the values down accordingly. Do not press OK.
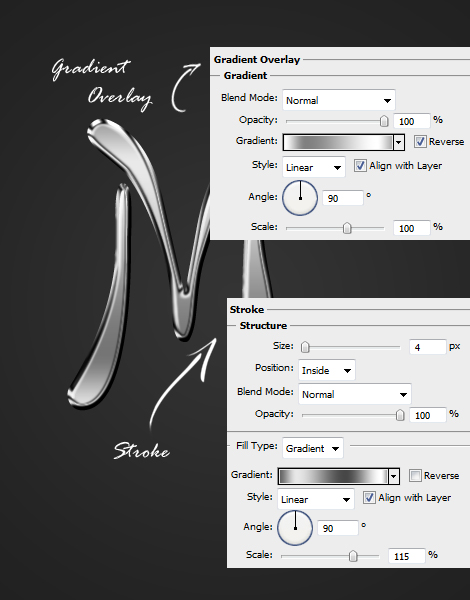
03. Now move to the Gradient Overlay tab and add a white – gray – light gray – white – gray gradient. Then move to the stroke tab and there also add a gradient stroke.
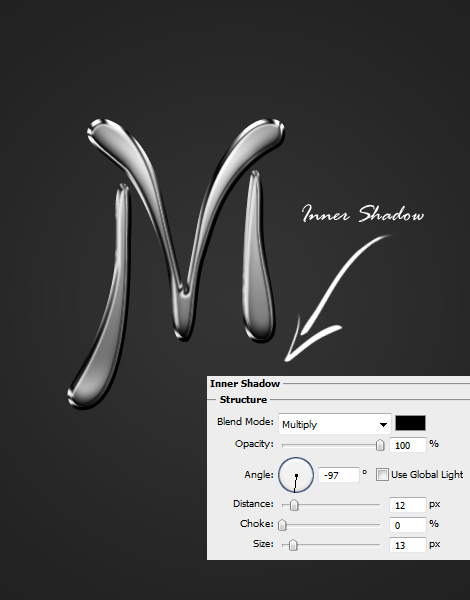
04. Add some inner shadow at the inner shadow tab.
05. And for the last, add some shadow. Press OK.
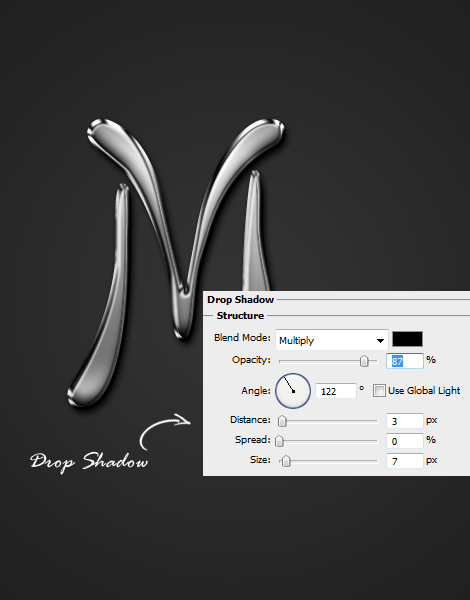
06. And you mercury text is ready to look dangerous!