How to Create Transparent UI Elements in Photoshop
This tutorial you will learn how to create transparent UI elements, buttons in particular, inside Photoshop. To successfully complete this tutorial, you’ll need a bit more than a beginner level in Photoshop.
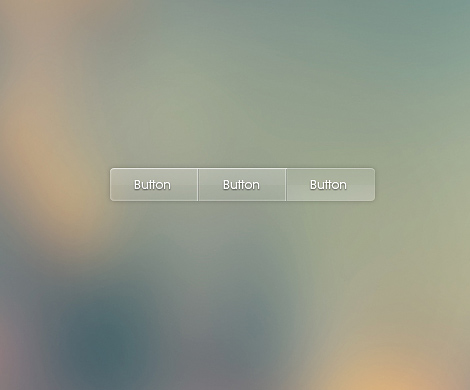
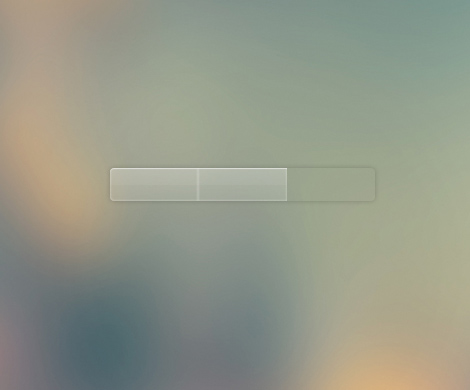
01. For the best transparent effect it is important to choose a background that has multiple colors, like some sort of gradient or even a picture. Then take the rounded rectangle tool and create a longer shape that’d fit 3 buttons.

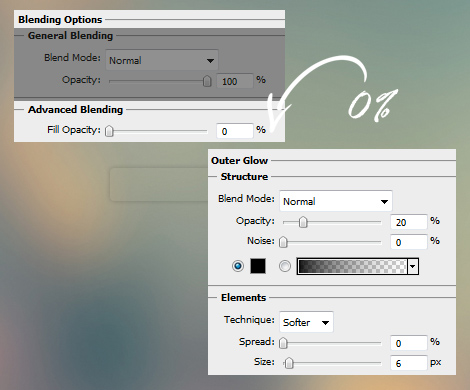
02. Now go to Layer > Layer Style > Blending options and lower the fill opacity to 0%. Then move to the Outer glow tab and set a small dark glow around the shape. Press Ok.
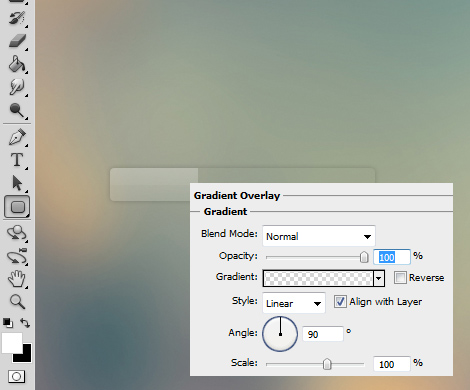
03. Take the same rounded rectangle tool and create a smaller button inside the first shape you made. Mask off the right side of rounded edges. Then go to Layer > Layer styles > Gradient Overlay and set the shape a transparent white gradient. Don’t press Ok yet.
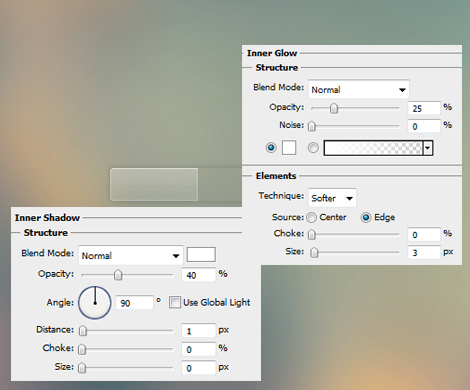
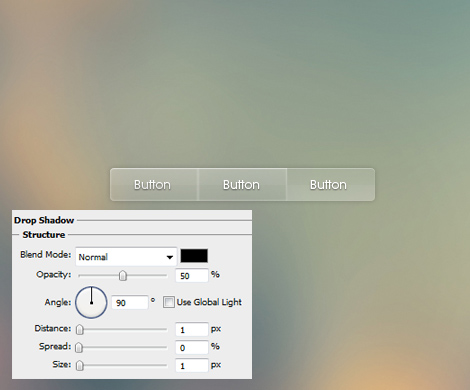
04. Give some light glow under Inner Glow and a very small light shadow under Inner Shadow tab. Press Ok.
05. Create the second shape but instead of starting to add the exact same styles on it, right click on the previous shape’s layer and click Copy layer Style and then right click on the new shape’s layer and choose Paste layer Style. Now both of your buttons share the same effects.
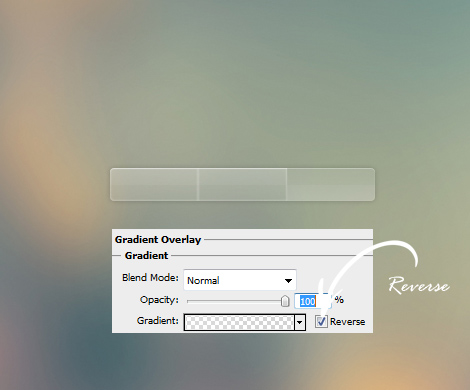
06. Create the last shape and add the same layer styles. But this time, double click on the layer after adding the styles, go to Gradient Overlay and set the gradient to Reverse. Now the last button has a nice pressed effect.
07. Add the texts on the buttons and also add them a small shadow so they’d be more readable.
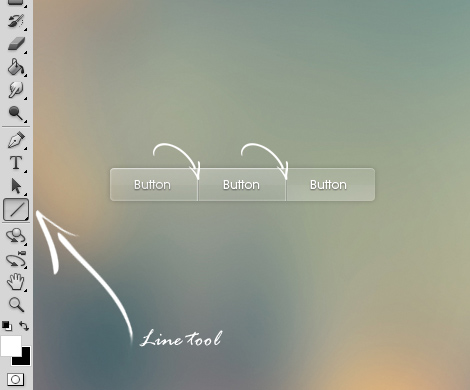
08. And the last thing to do is to add some dividers between the buttons with the Line tool. Be sure they are light gray.
09. And your transparent buttons are ready to use!