Create a Colorful Step by Step Wizard in Photoshop
This tutorial will show you how to create a colorful step by step wizard in Photoshop.
01. Open a new document, take the Gradient Tool and fill the background with the gradient. Create a new layer (Layer – New – Layer), pick the Polygonal Lasso Tool and create a arrow-shaped object and fill it with color.
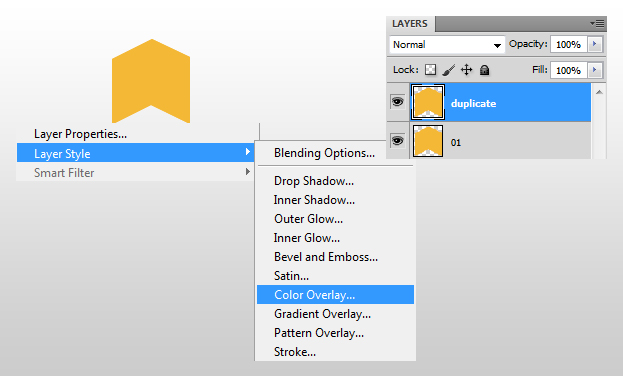
02. Duplicate the layer by right clicking on your shape layer and choosing duplicate. Then go to Layer – Layer Style – Color Overlay, a new window opens.
03. In the new window, choose another color and press OK. Now take the Arrow tool and move your duplicate under your 1st shape.
04. Do the same with the 3rd and 4th shape, each time creating a new layer. Then create a nother new layer, choose the Rectangular Marquee Tool and select the gap beween the arrow shape. Now choose the Eyedropper Tool and click with it on your lowest color. Choose the Paint Bucket tool and fill the selection with the color.
05. Make a new layer again, select the part under your shapes and color it with the lowest color. Then Take the Eraser tool and brush the lowest part of the selection. Set the Opacity to 19%.
06. Take the Type tool and insert your texts.
07. And your step by step wizard is ready to use!


