What is Adobe Photoshop Bridge?
This tutorial will teach and show you all you need to know about the Adobe Bridge. Lets start by explaining what is the Bridge for? Mostly it is an organizer or manager where you can view your pictures and folders and manage them within the Bridge – rate the pictures, review, examine metadata and do basic edits in Camera Raw. To access the Bridge, just look for a button in Photoshop since the program goes hand in hand with it or just open it from your program’s list. The icon of the Bridge is shown on the picture below.
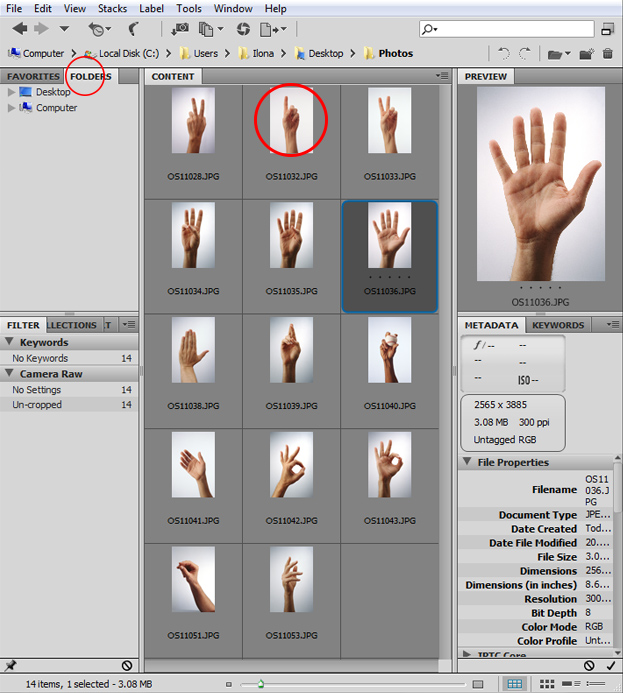
Now lets open the Bridge. At first it may seem a bit overwhelming with all the things around, but after concentrating, you’ll see that there is nothing difficult. On the right left upper side you see Folders or Favorites that will allow you to search any folder or picture from your computer. In the middle, the Content, is the content of the place you currently are, like a folder where your pictures lay. When clicking on one, you’ll get a small preview on the right upper side of the Bridge and under the picture you can see all the data about the picture – how large it is, what file type, color mode and so much more.
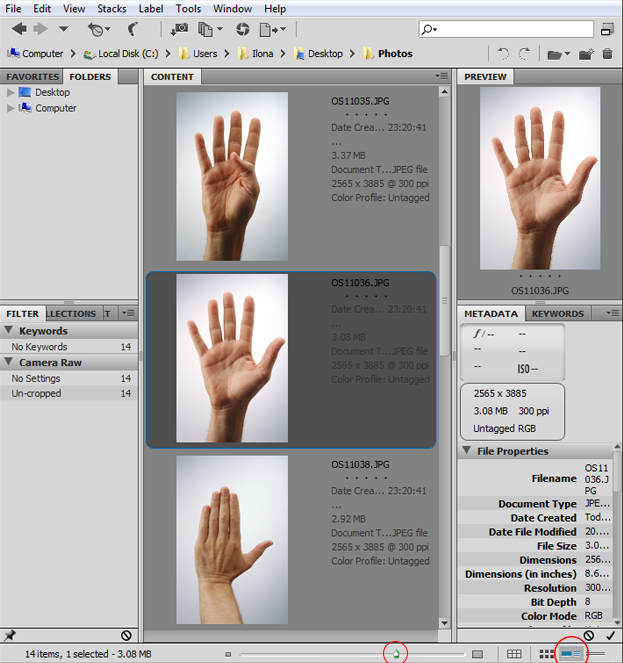
On the bottom of the Bridge you can change the thumbnail’s size by moving the bar either left or right and from the bottom right side you can set how you want your thumbnails to be shown – as a list, as a grid, as thumbnails etc.
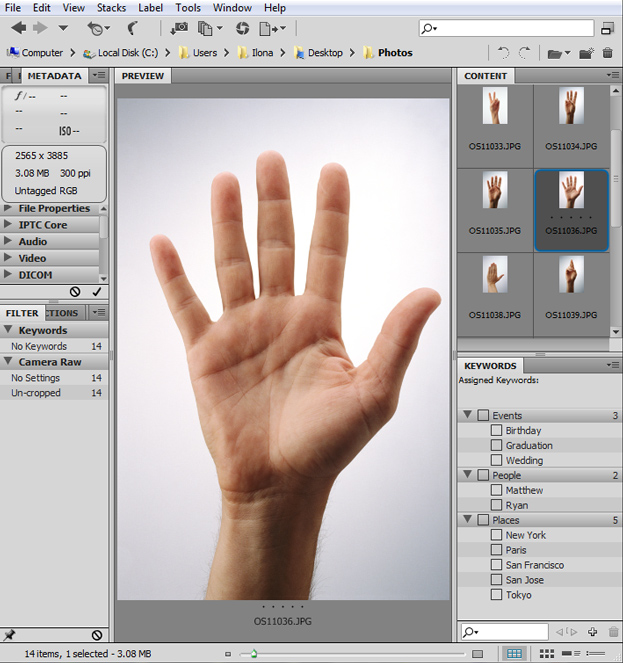
You can also customize your Bridge as in move the windows around and resize them by dragging on the edges – the preview to the middle and thumbs to the right etc however you wish. The program will actually remember your settings so next time you run the Bridge, your customized look will be there.
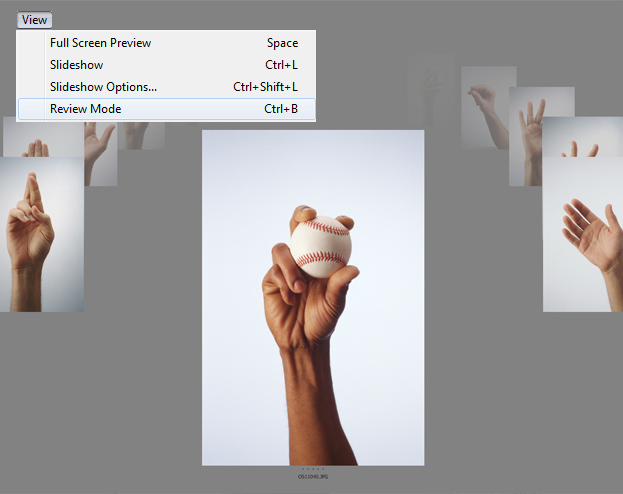
Adobe Bridge also offers many ways to view your pictures. All of those can be found in the menu View. One of the modes is the Review Mode as shown below but you can also choose from Full Screen Preview or Slideshow. All of them very good way of viewing your pictures or sharing them with someone else.
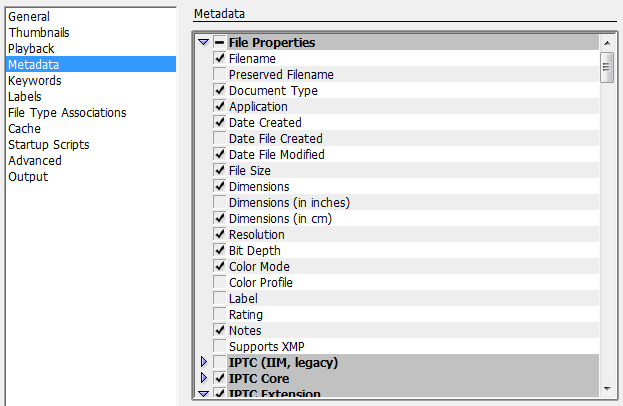
You can customize your Bridge even more by going to Edit – Preferences. You can choose what metadata to show and what not, the darkness/lightness of your Bridges interface and much more.
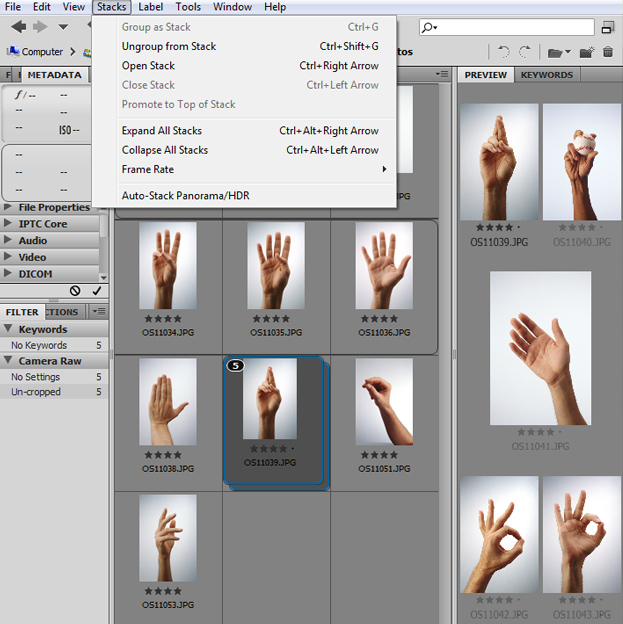
The next menu option we are gonna look at are the Stacks. Nothing complicated about that either – just select the pictures you wish and stack them. As shown on the picture below, we selected 5 pictures, selected the Group as Stack and the 5 pictures are now stacked under each other. This gives you a good chance to sort all the pictures the way you want to either rename only that stack, rate only that stack or label that stack. A very good way to organize your pictures, especially as a photographer.
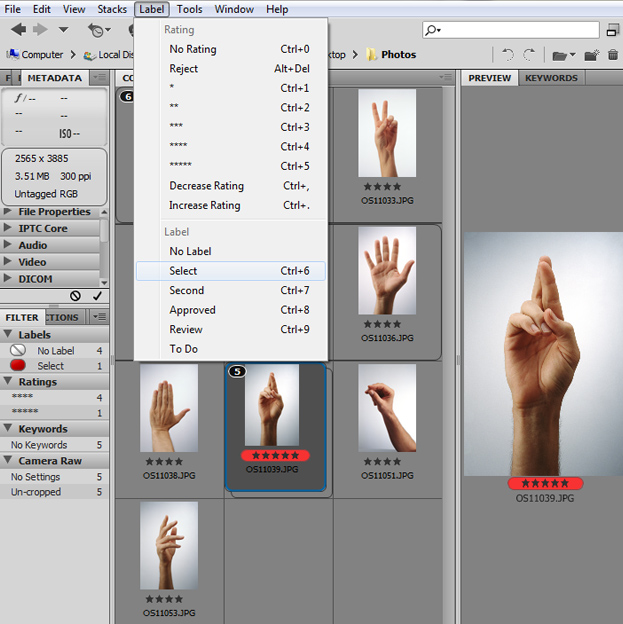
In the Label menu option you can either label or rate the selected pictures which later on gives you the chance to find the pictures very fast from the Filter that you can find from the left side of the Bridge. As seen on the picture below, we labeled and rated our stacked 5 pictures and because we stacked them, they all got the same label and rating. Of course you can also just select many pictures and give them all the same rate and label without stacking them.
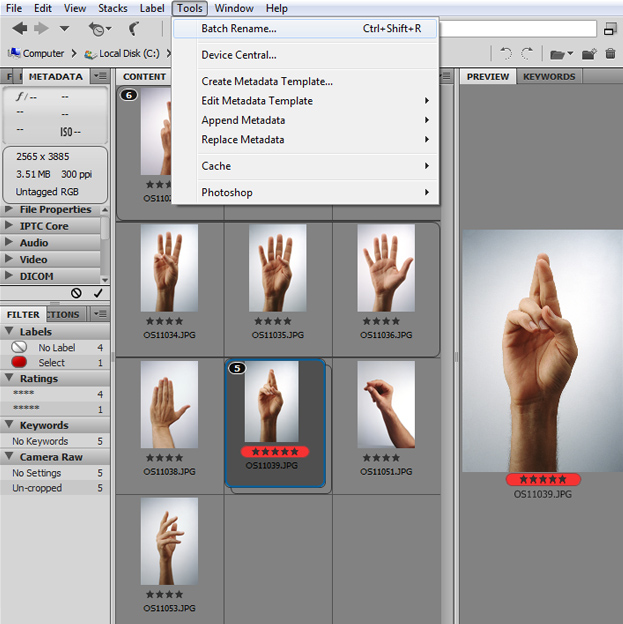
Lets move on to the Tools menu. There is a very useful and nice tool – Batch rename. Just select the pictures or a whole folder, then go in the Batch Rename and select how you like your pictures to be named (what text you want the files to include in their name, date, sequence number, etc). And then just press Rename and all your pictures will be renamed instead of you one by one renaming hundreds of pictures. You can have the pictures renamed as 01, 02, 03… 001, 002, 003… picture-1, picture-2, picture-3… the possibilities are endless and all yours to choose.
And that is all you need to know to have a very nice organizing time in Adobe Bridge. As you could see yourself, there are so many possibilities that with a regular browser you never can do. This makes your pictures so much more organized and you’ll never have to search a picture for long time. Have a happy managing time!
