How to Resize a Picture in Photoshop
This tutorial will show you how to re-size your image inside Photoshop.
01. Firstly, open the image you’d wish to re-size in Photoshop. For that, open Photoshop, then go in the Photoshop menu to File > Open, there locate your file and open it.
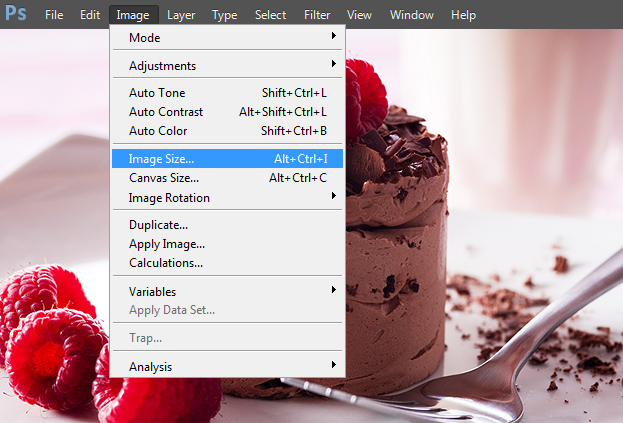
02. Now, again, go in the Photoshop menu and this time go to Image > Image Size.
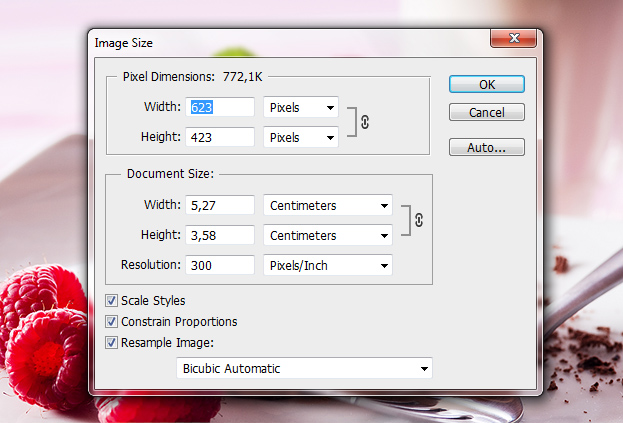
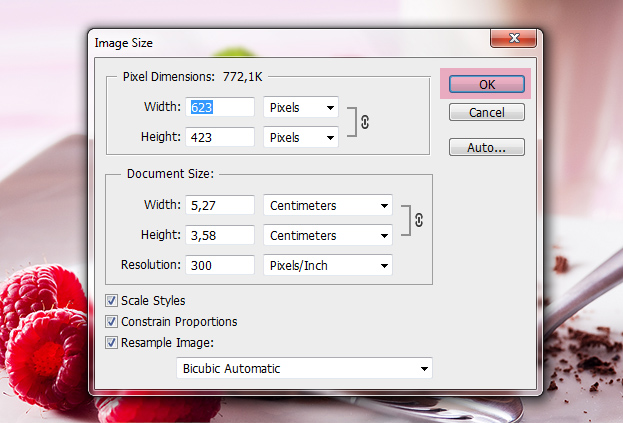
03. Now a new window will open. There you see many numbers and measurements that may confuse at first. But lets get them clear.
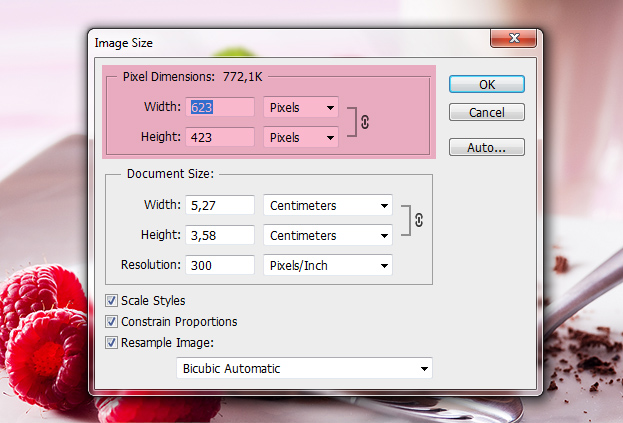
04. First, take a look on the most important block inside that window (colored pink) – The Pixel Dimensions. These are the 2 numbers that interest you when you want to re-size your picture. At first, you will see there the width and height that your picture currently have, but you can change them. The Pixels are measurements such as millimeter and cm are, so no need to be confused about that either. Now, to re-size your picture, just enter an new width or height, press Ok and your picture will be re-sized. Simple as that.
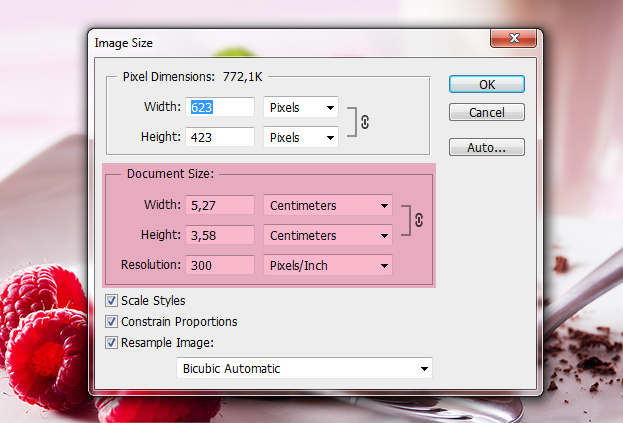
05. The lower box represents the printing size. This means, that the size you put there, the picture is going to be printed out with that size. So if you want to re-size your picture, then this is the box that you are not interested in. This is only for printing size and wont affect the image size.
06. Now when you changed your image size, just press Ok and your image will be resized.
07. Now you know how to re-size your images whether for uploading to a site or just for e-mailing.

